Sunday, August 18, 2013

Black-eyed pea curry

One lazy sunday afternoon, I was wondering what to cook up for lunch. My fridge was almost empty and that's when I discovered a packet of black-eye pea sitting in the shelf. Black-eye pea or Lobia is common to California and it is low in fat and rich in protein and fiber. Although in South India we do not make this often, Lobia curry is famous in Punjab and it can be served with hot rotis.

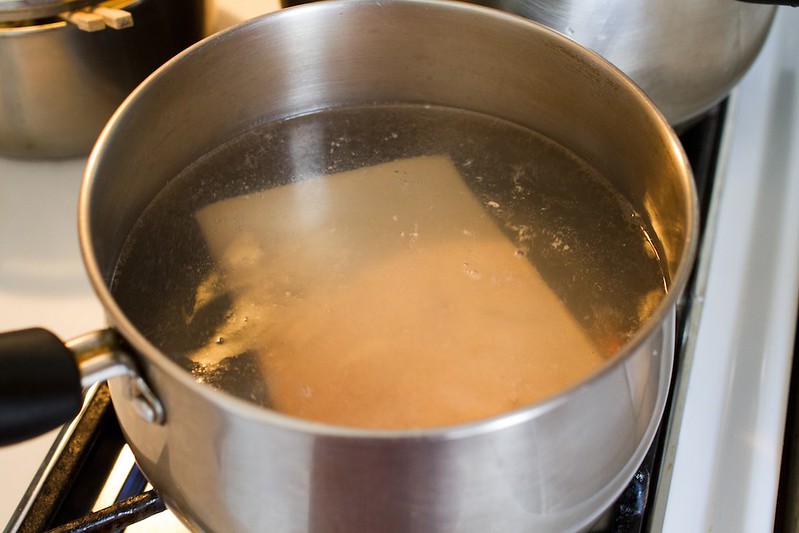
Canned black-eyed peas are easier to cook but I prefer to use the packet version. The packet version peas have to be soaked overnight preferably.


Once the peas are soaked and ready to be cooked, dice a medium sized onion, some chilies, garlic, and tomatoes. 


In a pressure cooker, heat up oil and add cloves, cardamom, bay leaf and cinnamon. 


Once the aromas of the spices have come out, add cumin seeds (jeera). 


Next, add in the chopped garlic. 


Add in the chopped onions and mix. 


After the onions are sauteed till they are translucent, add green chillies, and tomatoes. Add in turmeric powder, chilli powder, cumin powder and coriander powder. 


Once the spices have lost their raw smell, add in the soaked black-eyed peas. Add in 2-3 cups of water. 


Mix everything well. Add in salt. Now put the lid on and pressure cook this for around 4 whistles. Tada, yummy black-eyed peas curry is now ready to be savored hot with rotis or rice. 


If you want to add cream/milk to thicken the consistency, you can do so at the end. This is optional. You can also garnish with chopped cilantro leaves. 

Sunday, August 11, 2013

Fiery red chilli chutney

Xiao got me some amazing fresh red chillies from his backyard last week. In South India, we are huge fans of chillies that are super hot! So when I got these chillies, I decided to make a spicy red chilli chutney with it.


Ingredients

Red chillies - 10-12 (Fresh or dry)
Red onion- 1/4 (cut into small pieces); if you can get hold of shallots, use those. the flavor comes out much better.
Asafoetida - a pinch
Garlic- 1-2 pods
Tamarind- a small ball/1 tsp paste
Salt to taste

Preparation

1. Heat oil and fry the red chillies for 2-3 minutes till they start to glisten.


2. Once the red chillies are done, take them off the fire and put in the cut onions. Fry them till they are golden brown. 


3. Next, put in the garlic pods (you can mince them or put it in as pods), add the asafoetida and the salt.


4. Mix everything together nicely and switch off the fire. Now add in the tamarind and combine well. 


5. Wait for the mixture to cool and blend it in a blender, along with the red chillies. Your red chilli chutney is now ready! 


6. Serve this red chilli chutney with hot, hot dosas. 


Friday, September 21, 2012

Biriyani- Kerala Malabari Style

After having lived in Hyderabad (the land of Nawabs and Biriyani :P) for six years, I am a huge fan of biriyani and now that I live in Los Angeles, I miss some good ol' spicy chicken biriyani, immensely. Biriyani (from Beryan, Persian) is a rice-based dish made with your choice of meat (normally chicken, beef, or lamb), vegetables, spices, and garnished with eggs and roasted cashews and raisins. There are several versions of the biriyani! In India alone there are around 20 typical and famous biriyani preparations.  


One which is very popular is called Dum Biriyani and it is made with the rice, marinated meat, spices and vegetables all cooked together in an earthen pot. Yumm.

So, I was entertaining some guests the other day and I was wondering what to make. Something not too complicated, yet delicious and tasty. That's when I decided to make the Malabari chicken biriyani or Kozhikoddan biriyani, from the Southern most part of India. This biriyani requires three steps- marination, boiling the rice, frying the chicken. 

Malabari Chicken Biriyani
Serves 6-8

Ingredients
To marinate:
Cilantro- 1 sprig
Mint- 1 sprig
Lemon juice- 2 tbsp
Garlic- 2-3 tbsp
Ginger- 2-3 tbsp
Cumin seed- 1 tsp ground
Turmeric powder- 1 tbsp
Red chilli powder- 1 tbsp
Curd- 2/3 cup
Jalapeno pepper- 2-3
Curry leaf- 1-2 stem
Salt- to taste


For the rice:
Clarified butter/Ghee- 2-3 tbsp
Basmati rice- 3 cups washed
Cinnamon stick- 2
Cloves- a handful
Cardamom pods- 1 tsp
Whole pepper pods- 1 tsp
Curry leaf- 1 stem
Onion- 1

For the chicken fry:
Chicken- Drumsticks and thigh pieces, about 2.5 lbs washed and cleaned
Onion- 1
Tomato- 1
Vegetable oil- 1 tbsp


To garnish:
Eggs- 3, boiled
Mint- 1 stem
Raisins- a handful
Cashewnut- Raw and unsalted, to be roasted

Method:

Marination-
The first step is to clean the chicken pieces thoroughly and then prepare the marinade.


Clean the cilantro and mint leaves and chop them slightly before putting them in the blender. Add Jalapeno peppers ( I used some really spicy red peppers from Xiao's backyard! They were really good).

Mix in the lemon juice, mashed garlic and ginger, powdered cumin seed, turmeric powder, red chilli powder, curry leaf (I couldn't find curry leaf in LA, but it tastes much better with the curry leaf) and blend.


You should make a thick paste with these ingredients. Add salt to this mixture.


After this is done, add in the 2/3rd cup curd. The curd I used was fage yogurt. I prefer using thick curd since the marinade needs to be thick. Otherwise, there will be excess water which might be difficult to drain out.


Slit the chicken pieces and nicely coat each of the pieces with the marinade and keep aside at least for one hour. I kept it marinated overnight so that the chicken turns really tender and the marinate seeps in.


Preparing the Rice-
The next step is to prepare the rice. Wash 3 cups of Basmati rice and keep aside. In a pot, heat 3 tbsps of clarified butter or ghee. Once heated, add onions and fry till translucent.

Add the cinnamon sticks, pepper pods, cloves, cardamom and curry leaf, salt. Add in the washed rice and fry it in the butter for 2-3 minutes. Add in water and let the rice boil till done. Keep aside.


Frying the chicken-
Once the chicken has been marinated, the next step is to fry the chicken. Heat some vegetable oil in a frying pan and add onions. Once the onions turn light brown, add tomatoes. Next add in the marinated chicken and fry it in the onions and tomatoes. Let the chicken boil in this mixture. It is normal for the water to seep out from the chicken (and from the curd). Allow the water to boil off. Once the chicken is done, keep aside.

For the garnish-
Boil 3 eggs and remove shell. Roast the cashews on fire for a couple of minutes.

Final preparation-
In a huge serving bowl, put one layer of the prepared rice and an alternate layer of the chicken. Keep alternating between the rice and the chicken.


Garnish with the roasted cashews, the boiled eggs, raisins and a stem of mint (I used one from my kitchen!)


Saturday, March 24, 2012

Dongpo pork! (Pork Belly)

I am such a fatty. And I have no shame about it...


Well, that's not entirely true. Maybe there is a little bit of shame in me, which is why I decided to cook pork belly after I ran 2 miles. But, alas, I bet the calories I burnt during my 2-miler were only a teeny tiny fraction of the calories I got from the yummy but fatty pork belly. Oh well.


1. frozen! This is a 1 pounder


2. Boil it for 25 minutes (less time if your belly is defrosted :))
Inline image 2

3. Spices and herbs you need: Ginger, garlic, Sichuan peppercorns, black peppercorns, star anise, half a cinnamon stick (didn't have it),  and scallions (i didn't have any so I used onions instead)

Inline image 3
 
Inline image 4

4. Take your belly out of the boiling water and cut it into pieces. I'd say 1.5 inch squares would be good. 

Inline image 5

5. Put the spices and herbs on the bottom of a pot, and then put the belly into the pot, with the skin facing down. Make sure the pot is NOT too big. I ended up transferring everything from the pot below to a smaller pot.

Inline image 6

Inline image 7
(As you can see, the pot is too big...You don't want much liquid in it)

6. Now you need to add the following ingredients into the pot:
a). 0.5 - 1 cup of soy sauce (I like this Japanese brand the best). You could first put int 0.5 cup. Later if it is not salty enough, add more. For this dish, you don't need to use any table salt (? is that how you call it? Solid salt? LOL)

Inline image 8

b). Shaoxing Cooking wine. If there are Chinese supermarkets, you can find this. There are different brands making the same type of cooking wine. It's pretty cheap. This bottle cost me $1.7. Use 1 cup.
Inline image 9

c). Chinkiang vinegar: half a table spoon. This is really optional. You can choose to do without it. But I would recommend you not to use any other types of vinegar because the taste of this is quite different from vinegars found in American grocery stores.

Inline image 10

d). Sugar: 1 - 2 table spoons. I used 1. 
Inline image 11

e). Sesame oil: 1 table spoon (not pictured :D)

f). Add some water to (barely) cover the belly.

g). I also added some celeries on a whim. 


6. So you end up with this (below). Bring it to a boil, and then let it simmer for 2 hours (I know...it's long)

Inline image 12
(This is a smaller pot than the one pictured above)

7. After 2 hours, you end up with this:
Inline image 13


8. I am not done yet! I put the belly in a bowl, which was then placed in a large pot for steaming. and steamed the belly. Remember the put some soup into the bowl. (but not too much). Let it steam for 30 minutes. An alternative way to do it is to put it in the oven to bake for 30 minutes at 400F. If you decide to go through the baking route, also make sure to put the soup in the baking bowl or pan.

Inline image 15

9.  Ta da:

Inline image 16

Inline image 17

This is oily and can be salty, so you definitely need to have some white rice to go with it (jasmine rice is the best for this!). You can pour a couple of table spoons of the soup from the pot (from (6)) into the rice and mix it with the rice...YUUMMY. 

Try it :)